Collaboration among teams is the key to success in any business. Being able to reach your goals by means of privately managing certain contacts can be just as beneficial — and in some cases necessary.
This is why our Nimble Team is so excited about introducing customizable contact privacy! With this new feature, users can create separate groups of private and public contacts that can be managed by the account admin and/or the users of appointed admin groups.
Nimble CRM is at its heart an amazing Team Relationship Manager that enables business teams to stay on top of their lead nurturing, follow-up opportunities, email marketing, and sales goals from one unified database.
As an administrator of your Nimble account, you can grant permissions to different aspects of your CRM that individuals or teams need to access.
Marking contacts as “private” in the account does exactly that: it ensures that these contacts are for your eyes only. Contacts assigned as private by you will only appear in your contact list.
As an administrator, you can grant access and create a sense of hierarchy by way of setting individual or team permissions.
By setting groups, you can enable your sales team to manage pipelines while keeping deals private. You can also create an admin team that can manage billing services, remove users, manage contact deletion, and performs periodic backups of contact data.
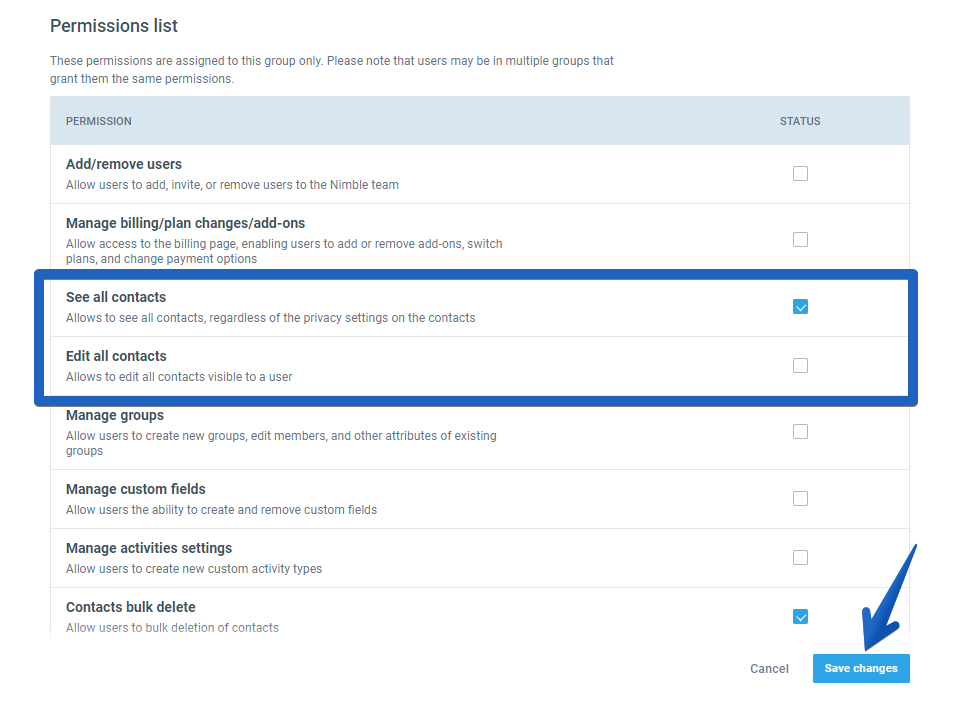
Now in the Permission List, you’ll see even more granular options to set contact privacy for individual teams:
You can learn more about group permissions here.
Each contact in Nimble has individual settings for privacy that will allow you to control who can see or edit that contact. We’ve also added separate permissions for who can view contacts and who can edit contacts.
Updating ownership and privacy field
To update the ownership and privacy field for an individual contact, use the inline editing feature by selecting one of the options from the drop-down list, or edit contact ownership directly from the contact record.
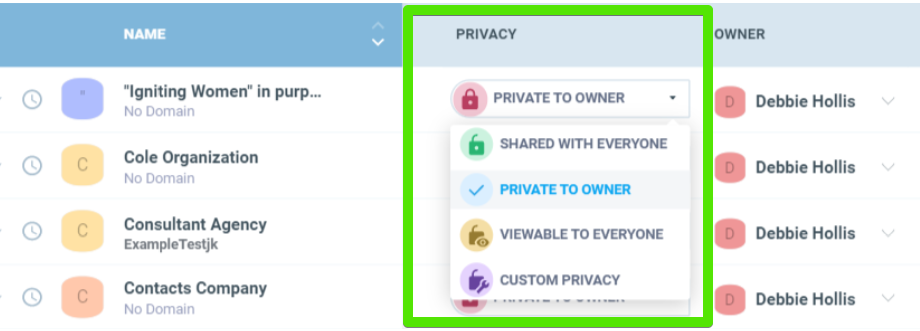
To update the ownership and privacy field for a select group of contacts, simply choose the contacts you want to update. You will then see the options to apply contact ownership and privacy changes in bulk!
What They Need to See — Nothing They Don’t
You can now set view permissions to control who can see certain contacts and any fields related to it. If a user doesn’t have permission to see a contact, Nimble treats it as if the contact doesn’t exist within that user’s database. It won’t appear in search, duplicate checks, or anywhere else.
Contact privacy is set when you add a contact and can be changed at any given moment of time by people who have permissions to edit contacts.
**Please note: the account admin has access to all contacts in the database. When you create a Nimble account, you have automatically defaulted as the account admin. As a first step, you can create groups to set default permissions when adding new users to the account.
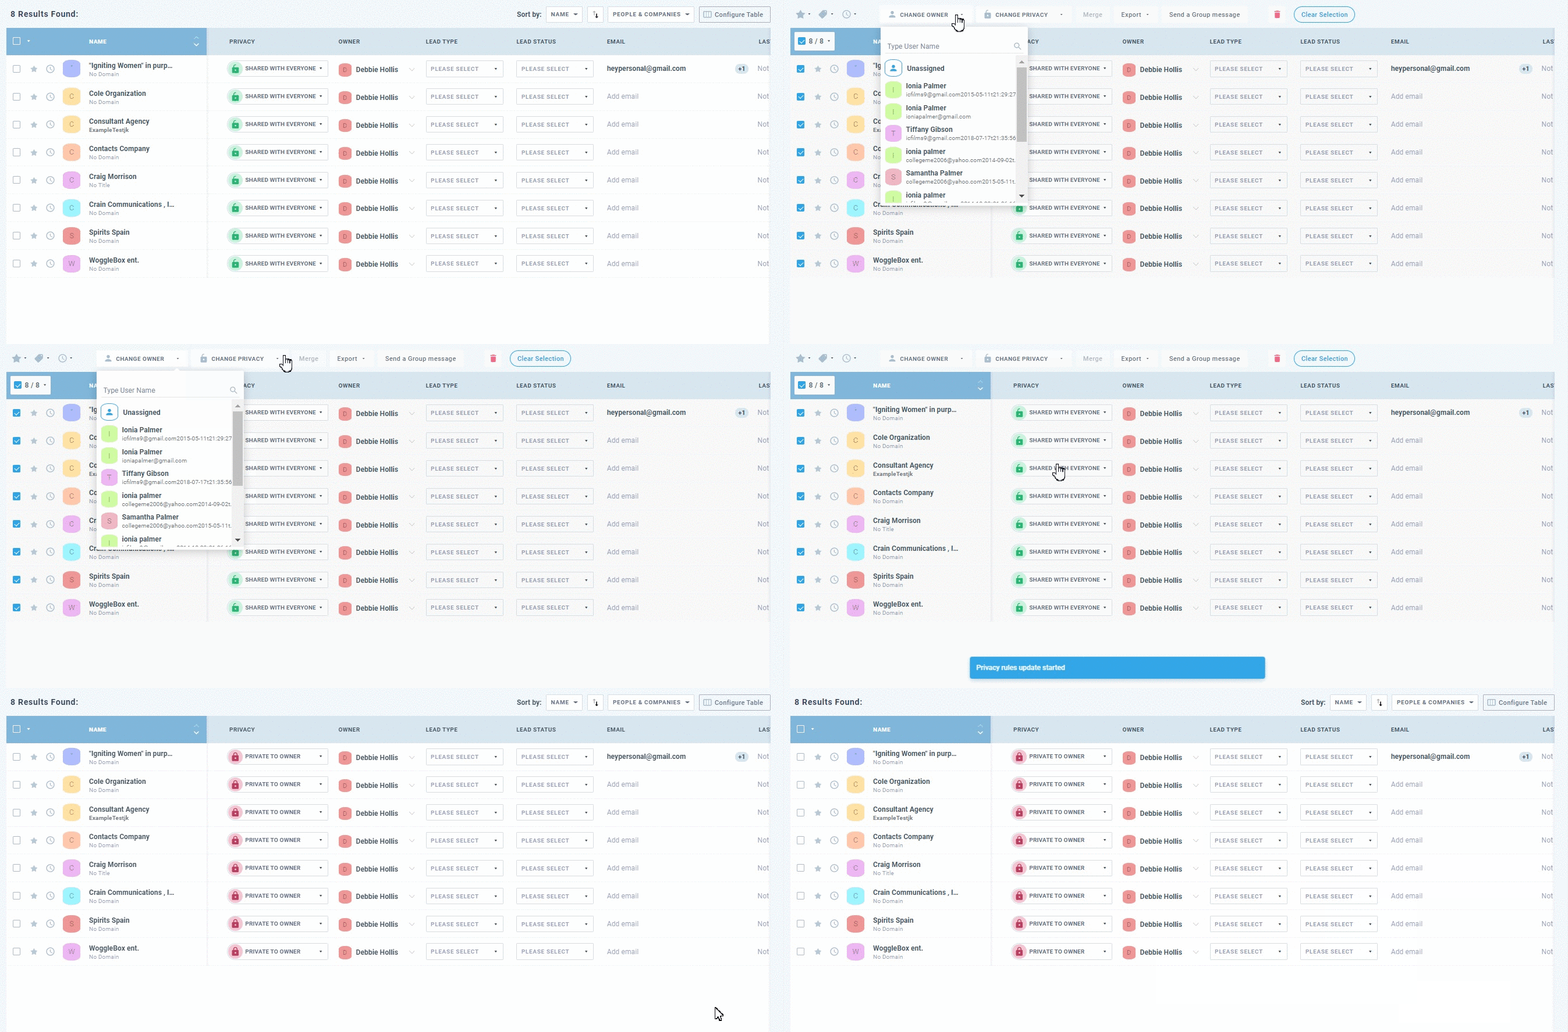
Nimble Tip: Use Segmentation to locate all contacts that are assigned to you as the Owner.
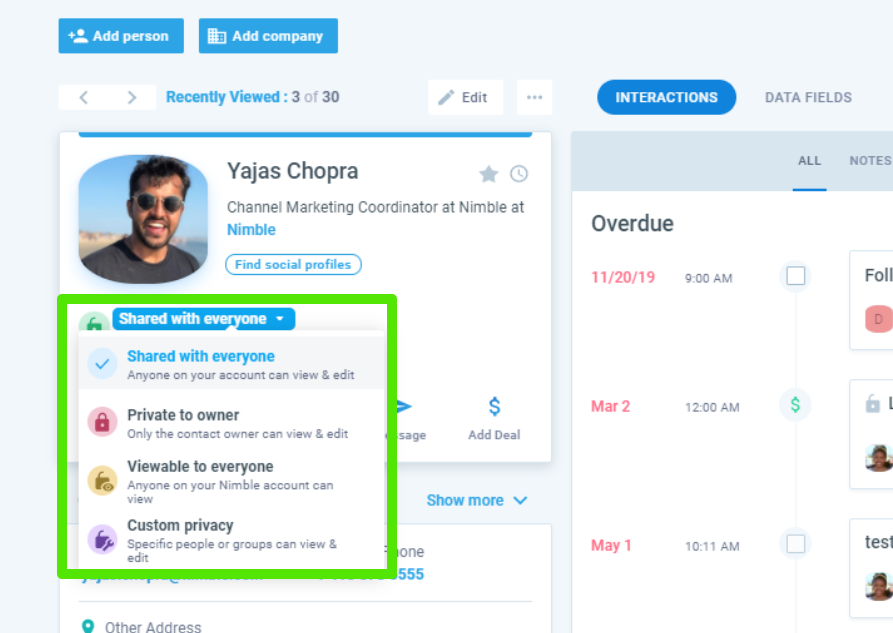
If you are the admin or have been granted admin permissions, you can also set contact privacy directly from the contact record.
All you have to do is visit the contact record and choose which privacy option works for you:
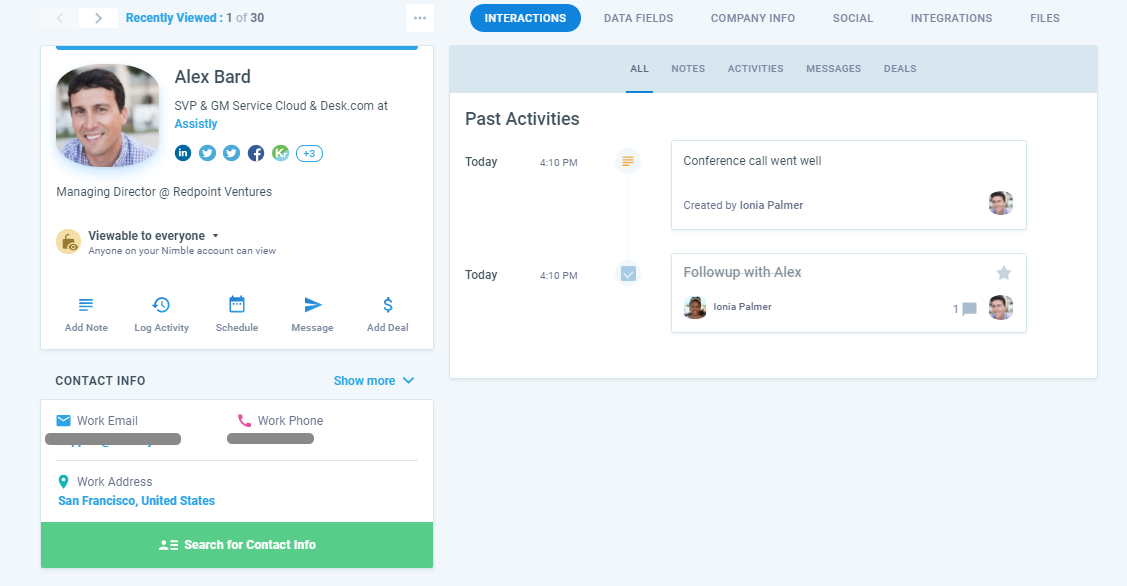
If a contact has been set to private, only the owner of the contact (and the account admin) will be able to view the contact. However, if the contact has been set to “Viewable to everyone”, you will be able to see all details, including information in the Interactions, Data Field, and Social tab.
You won’t be able to edit any information to a private contact (with the exception of attaching files to the contact record).
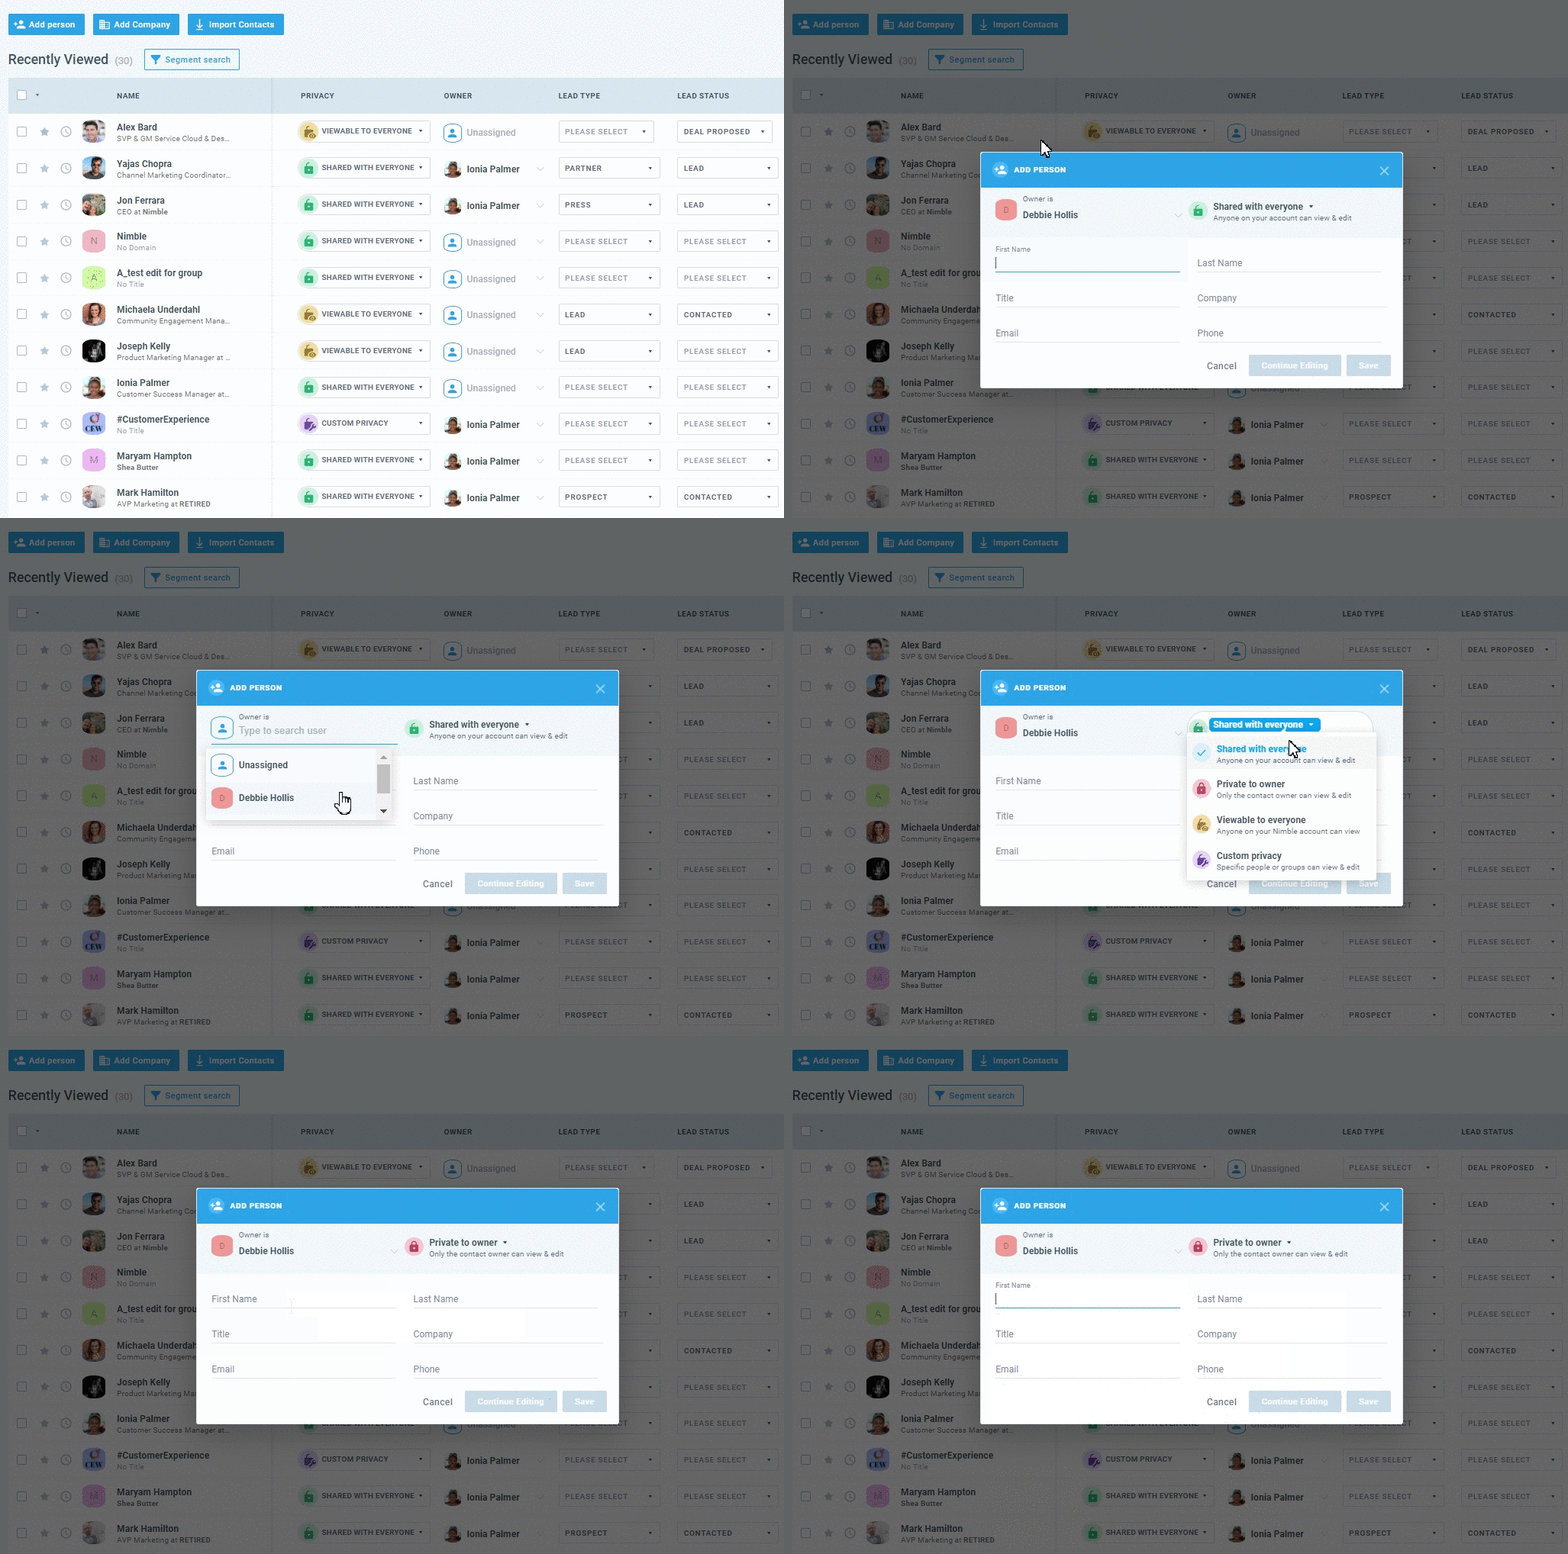
When creating a new contact, Nimble now provides the option to set an owner and privacy upon creation.
To start, visit your Contacts tab and click “Add Person” or “Add Company”. At the top of the contact form, you will see the option to choose the contact owner and who the contact is shared with.
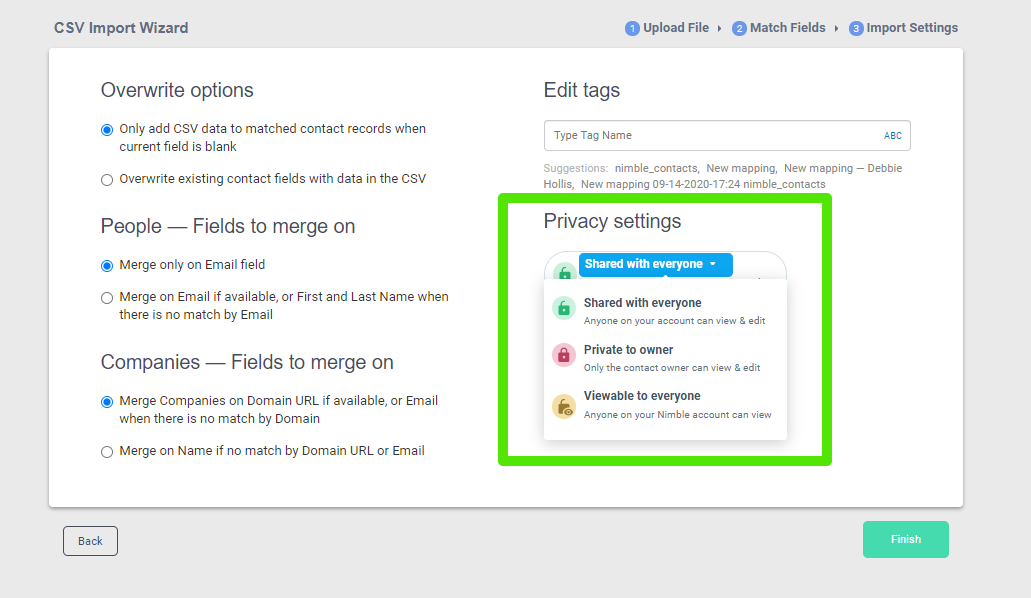
When uploading a CSV file, you’ll have the option to set privacy options for all contacts within that file. This will be available on the third page of the import process.
What’s New in Nimble CRM
- Redesigned contact record with inline editing and granular activity tracking. Log activities, view contact and company information, scan social signals, send trackable email templates, apply tags, and more — right from the contact record.
- Redesigned Browser Extension. The enhanced Nimble browser extension supports calendar, tasks, deals, and custom views. It’s easier to use, logged information can be edited with fewer clicks, and teams enjoy more functionality across multiple platforms.
- All-new Activities Listing Tab and Custom Activities Types. Teams are able to organize, prioritize, and track activities (including calls, tasks, and events) easier than ever. Additionally, custom activity types and inline editing enable teams to log tasks on a more granular level in order to organize activities based on their individual business needs.
- Email tracking everywhere you work. Send tracked email templates from everywhere you work: from contact records, the Nimble Messages tab, the Today Page dashboard, while mobile, and within the Nimble browser extension.
- Contact privacy with user group controls. Account admins are able to assign lead ownership, appoint contacts to specific users, create user groups for privacy that can be edited in bulk through segmentation, set privacy at import, and add new contact types (lead and account).
How to Get Started with Nimble
You can learn more about Nimble Contact Privacy on our FAQ page. If you do not have a Nimble account yet, we invite you to try it for free for 14 days.
Stay tuned for more product announcements as we evolve Nimble into the best CRM for Office 365 and G Suite teams.
