At Nimble, we strive to give you the simplest, smartest, and cleanest social CRM experience. Today, we’re happy to announce the ability to show custom data columns in the Contacts tab to give you all the information you’ll need, right at your fingertips. Learn more below to see how you can get started with custom Table Settings in Nimble.
Custom Table Settings allow you to personalize your table columns to quickly see the data that is most relevant for your business.
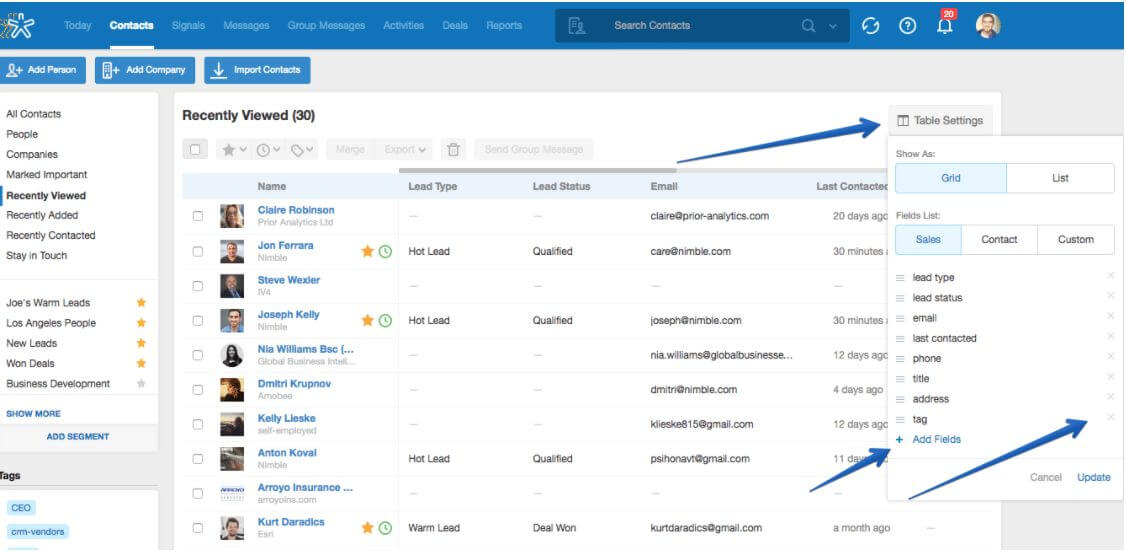
To get started, go to the Contacts tab and select “Table Settings” on the top-right.
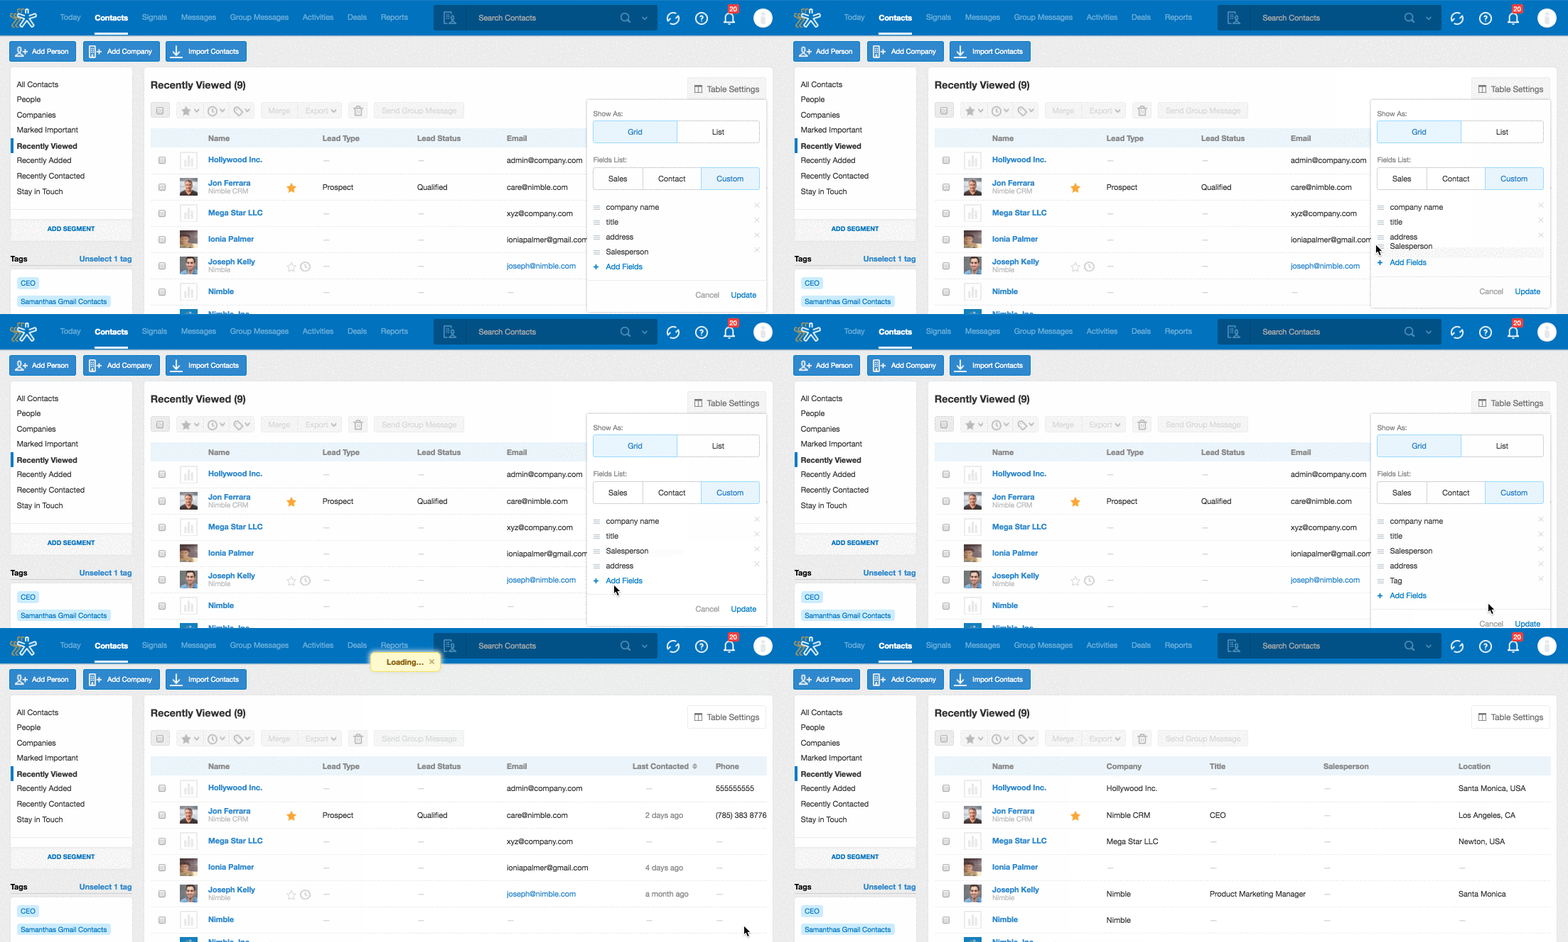
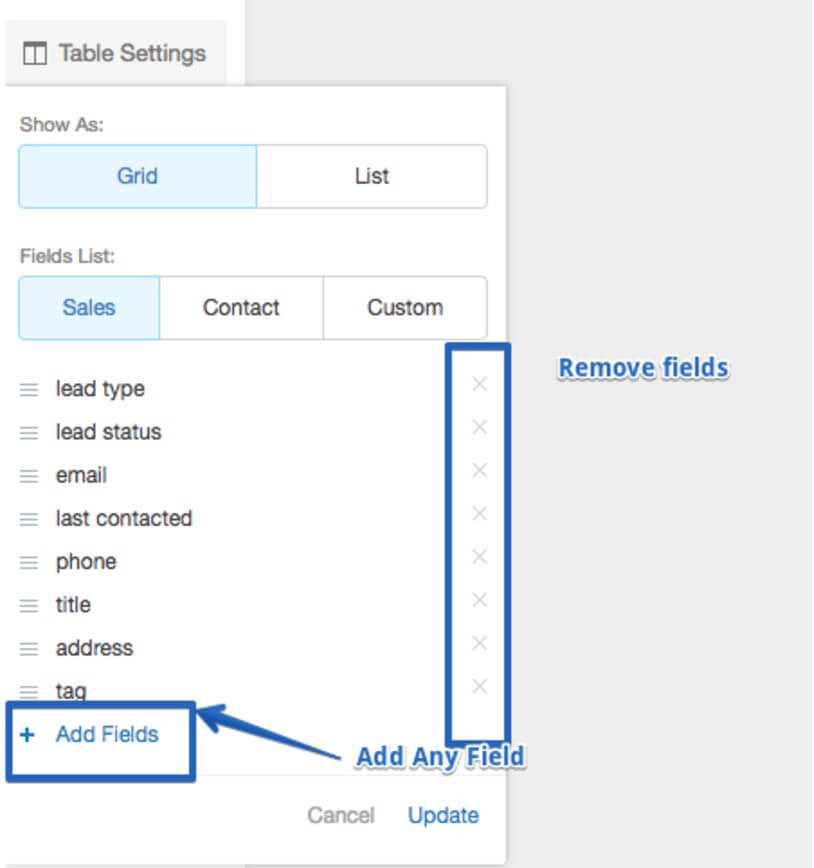
In “Table Settings” you’ll choose whether to show your contacts in a “Grid” or “List” view. By selecting “Grid” view, you can choose the way your field lists displays. Field lists can be viewed by “Sales,” “Contact” or “Custom.”
To create your personalized field list, select “Custom”. From here you can rearrange, add, or remove fields.
When you are ready, click “Update”.
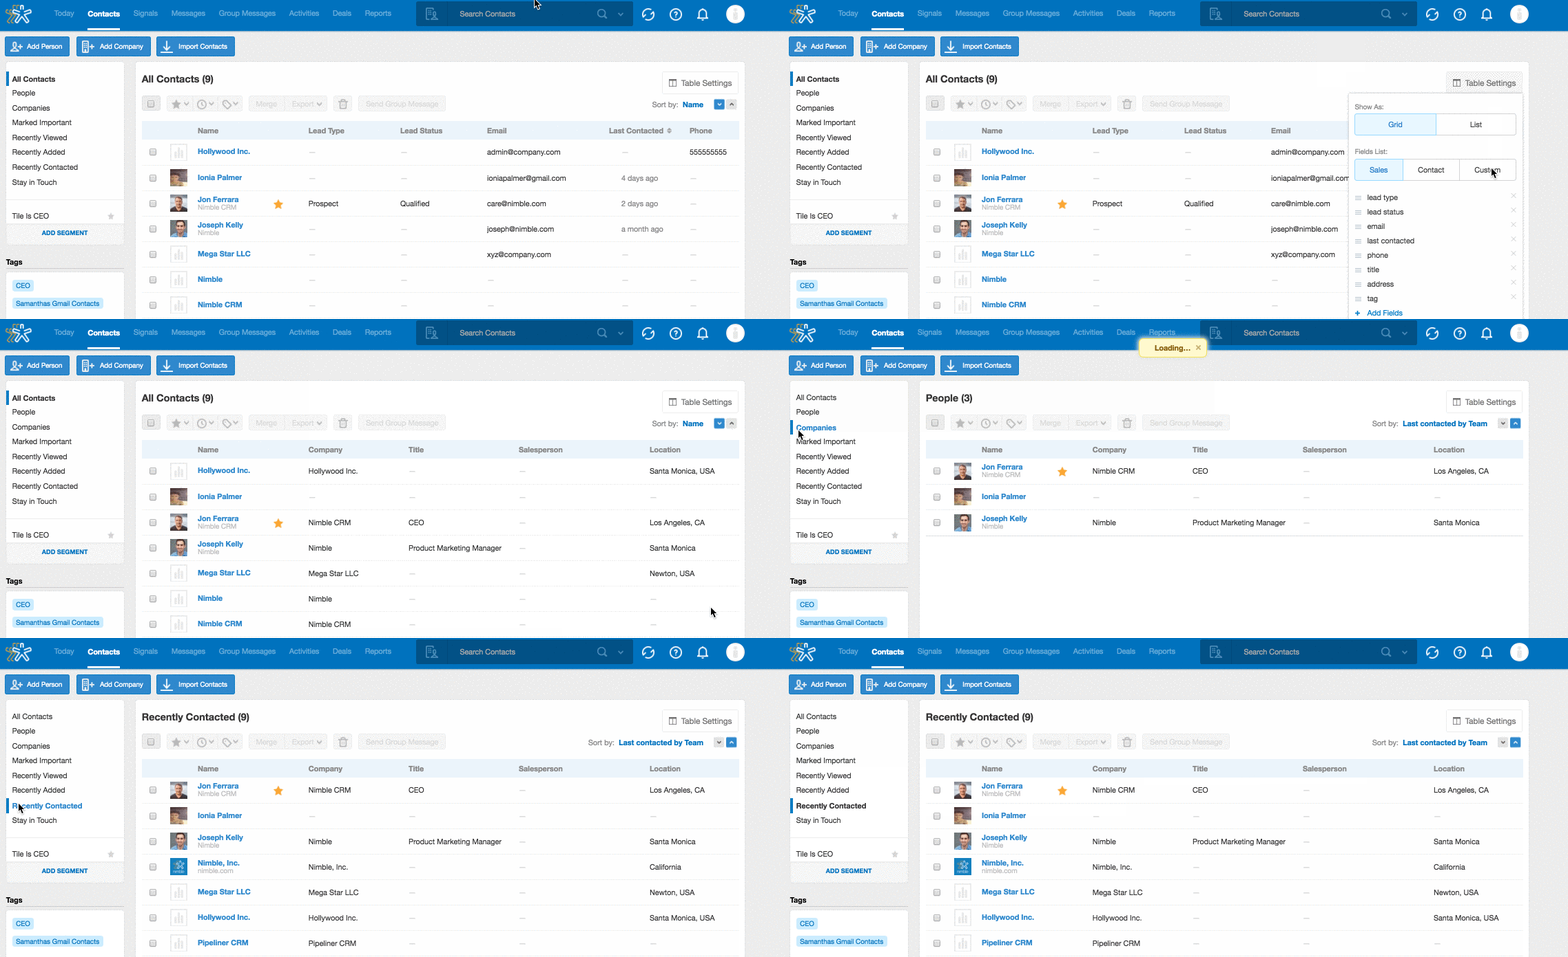
Now when you choose a filter, tag, or segment, you can view your list of contacts in this saved custom table setting!
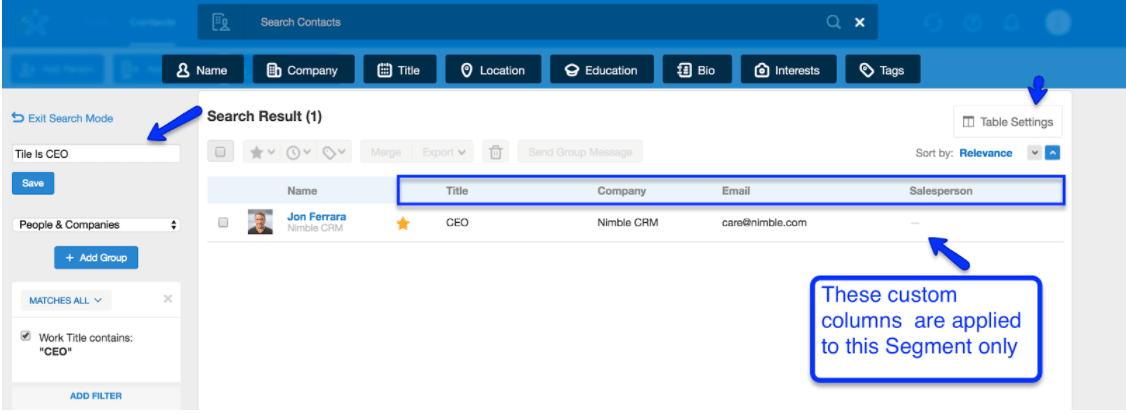
“Custom Table Settings” can also be saved to use later if you create and save a Segment. If you are building a smart segment to improve your outreach and organization, you can now create custom table settings for that particular segment so all your custom columns will display whenever you view the segment
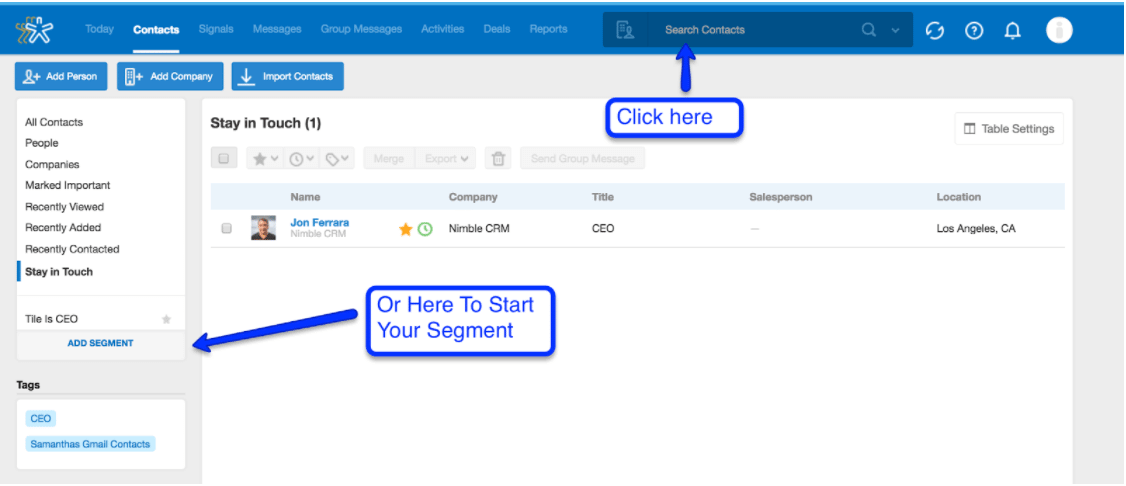
To start, in your Contacts tab, click within the search bar or select “Add Segment” on the left.
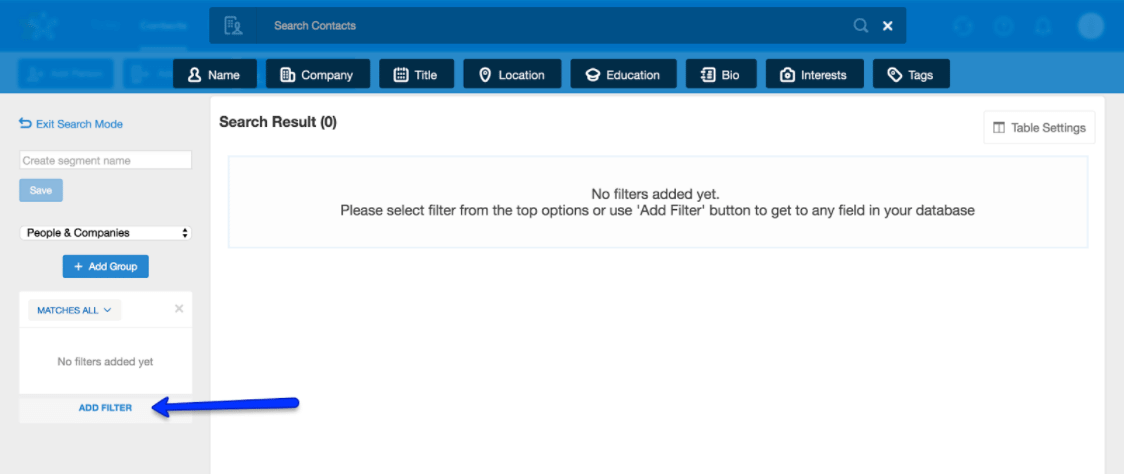
Click “Add Filter” and create your search.
Once you’ve created your search, your columns will automatically appear in the “Sales” view. Click “Table Settings” and utilize the above steps to create custom columns.
When you are ready, name your segment and click “Save” to save the filters with the custom “Table Settings”.
For more information about this feature, please check out the following support article: Nimble’s “Table Settings” Overview
Now that you know about this feature, go check it out in your Contacts tab. Feel free to share your feedback with us at [email protected] 🙂
