Did you know you can create targeted lists of contacts to reach out to groups of people using the Nimble Segmentation and Tag feature?
Or that you can send Group Messages directly from your lists of Nimble connections? You can also optimize your group outreach with email tracking and saved templates for quicker follow up messaging.
Here are a few ways to get the most out of group messaging through Nimble.
Tip #1: Import contacts to send targeted outreach
This could include importing lists of contacts using a CSV file, directly from connected social platforms, or using the Nimble Prospector tool to find phone numbers and email addresses of a possible prospect.
If you build lists of contacts directly in a file, this can be saved in a CSV format and imported directly to your Nimble account. When importing a CSV file, you can then map your fields to the correct location and build lists based off of specific criteria. Learn more about importing a CSV file into Nimble here.
The Nimble Contact Add-in enables users to add contacts directly from places like LinkedIn and Facebook to your Nimble account.
The Prospector tool helps users locate emails and phone numbers for all of your prospects and leads.
Tip #2: Create targeted lists of contacts using Tags and Segmentation
The Nimble Tag feature enables you to label contacts by different classifications. For instance, you may have a group of contacts that all purchased a specific product. You can label each of these contacts with the item they have purchased in order to differentiate your lists.
Learn more about tags here.
Segmentation enables users to create lists based on multiple criteria. This feature comes in handy when you are interested in creating a list of contacts that all live in a specific location, or hold the same position in a given company.
You can check out our support article for creating Segments in Nimble here.
Tip #3: Send a Group Message from your targeted lists of contacts
Now that you have a targeted list of contacts, you can send them a Group Message.
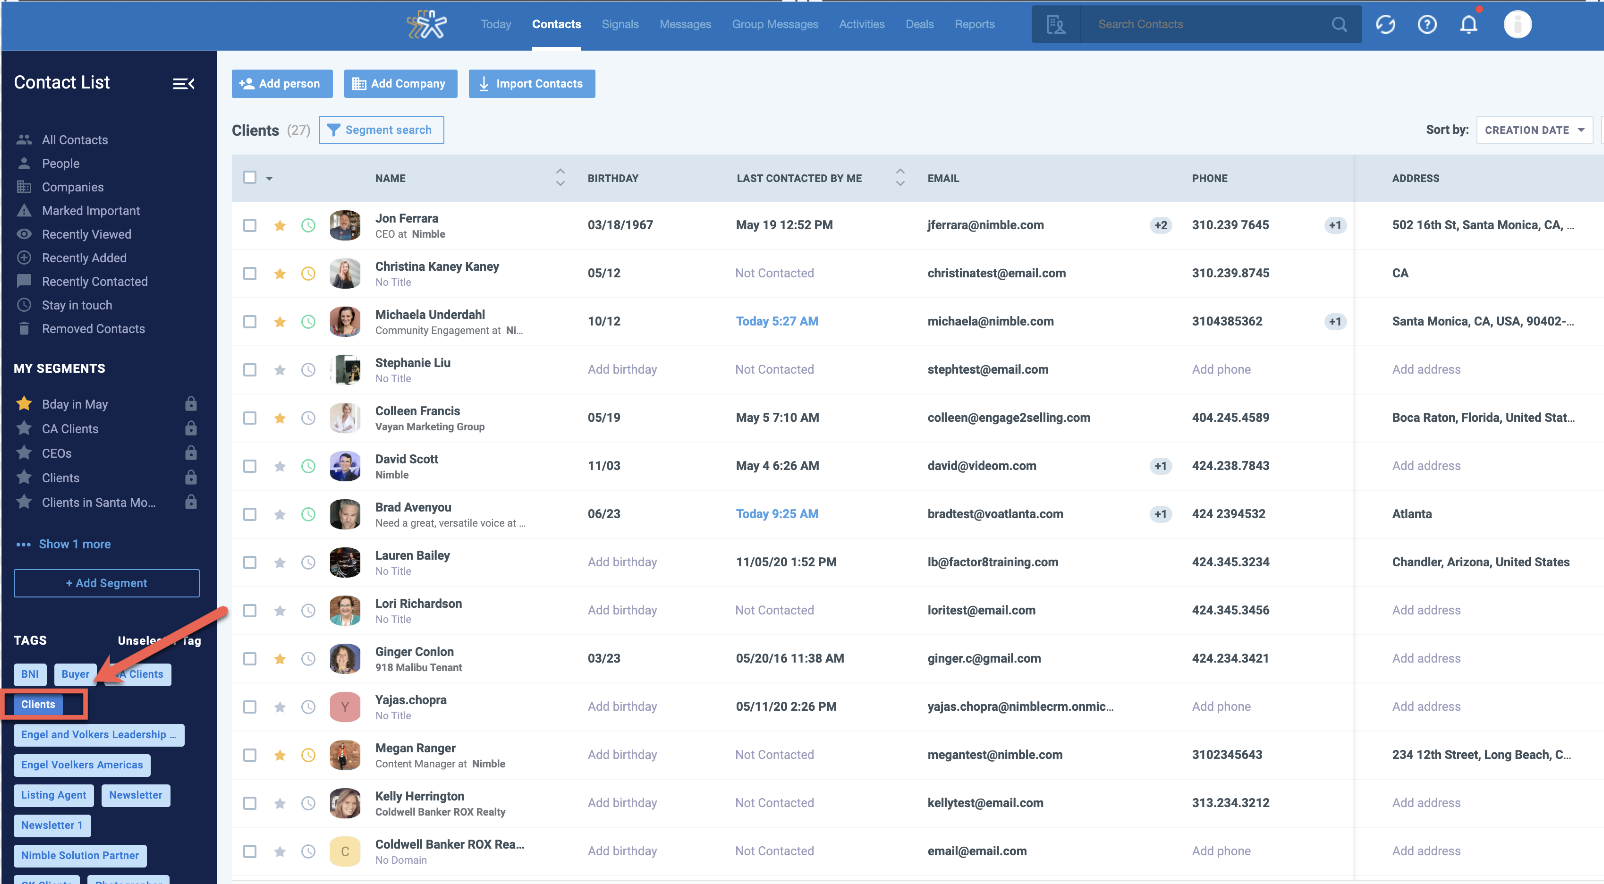
Go to your Contacts tab and select the desired tag or segment on the left-hand side of your screen. After selecting this tag, Nimble will build a list of all contacts that have this tag applied to their record.
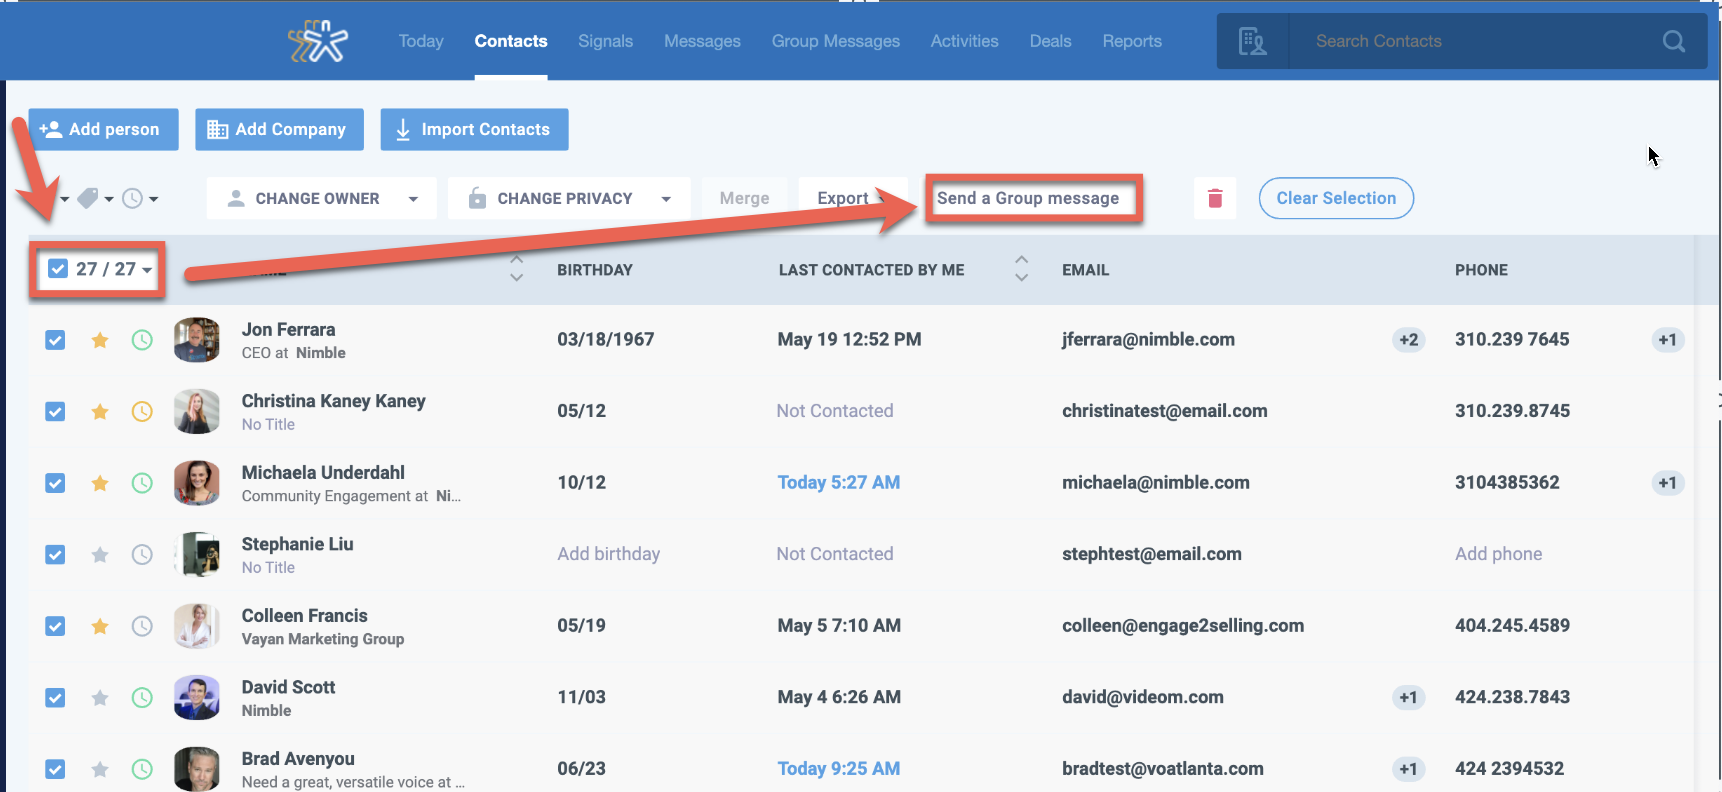
Once you have your list, you can select all of these contacts, and move forward with selecting the option to send a Group Message.
Tip #4: Follow up with contacts who haven’t opened your Group Message
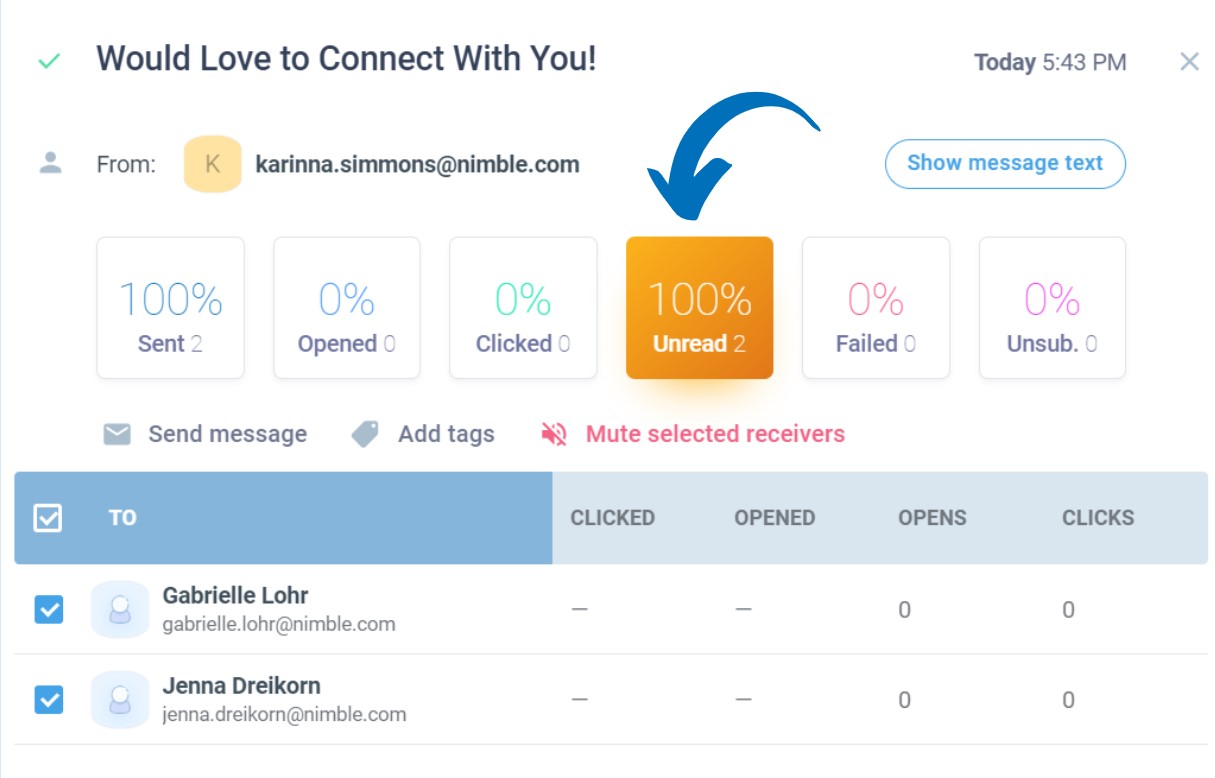
After sending your group message outreach to a targeted list of contacts, you can visit your Group Message dashboard to view analytics. From here, you can see how many of your recipients have opened your message or interacted with a link within the outreach.
This tool enables you to reach out to recipients who have not yet read your message in order to identify potential follow-up opportunities.
Once you have identified the recipients who have not yet read your message, you can then select the option to send a follow-up right from the dashboard.
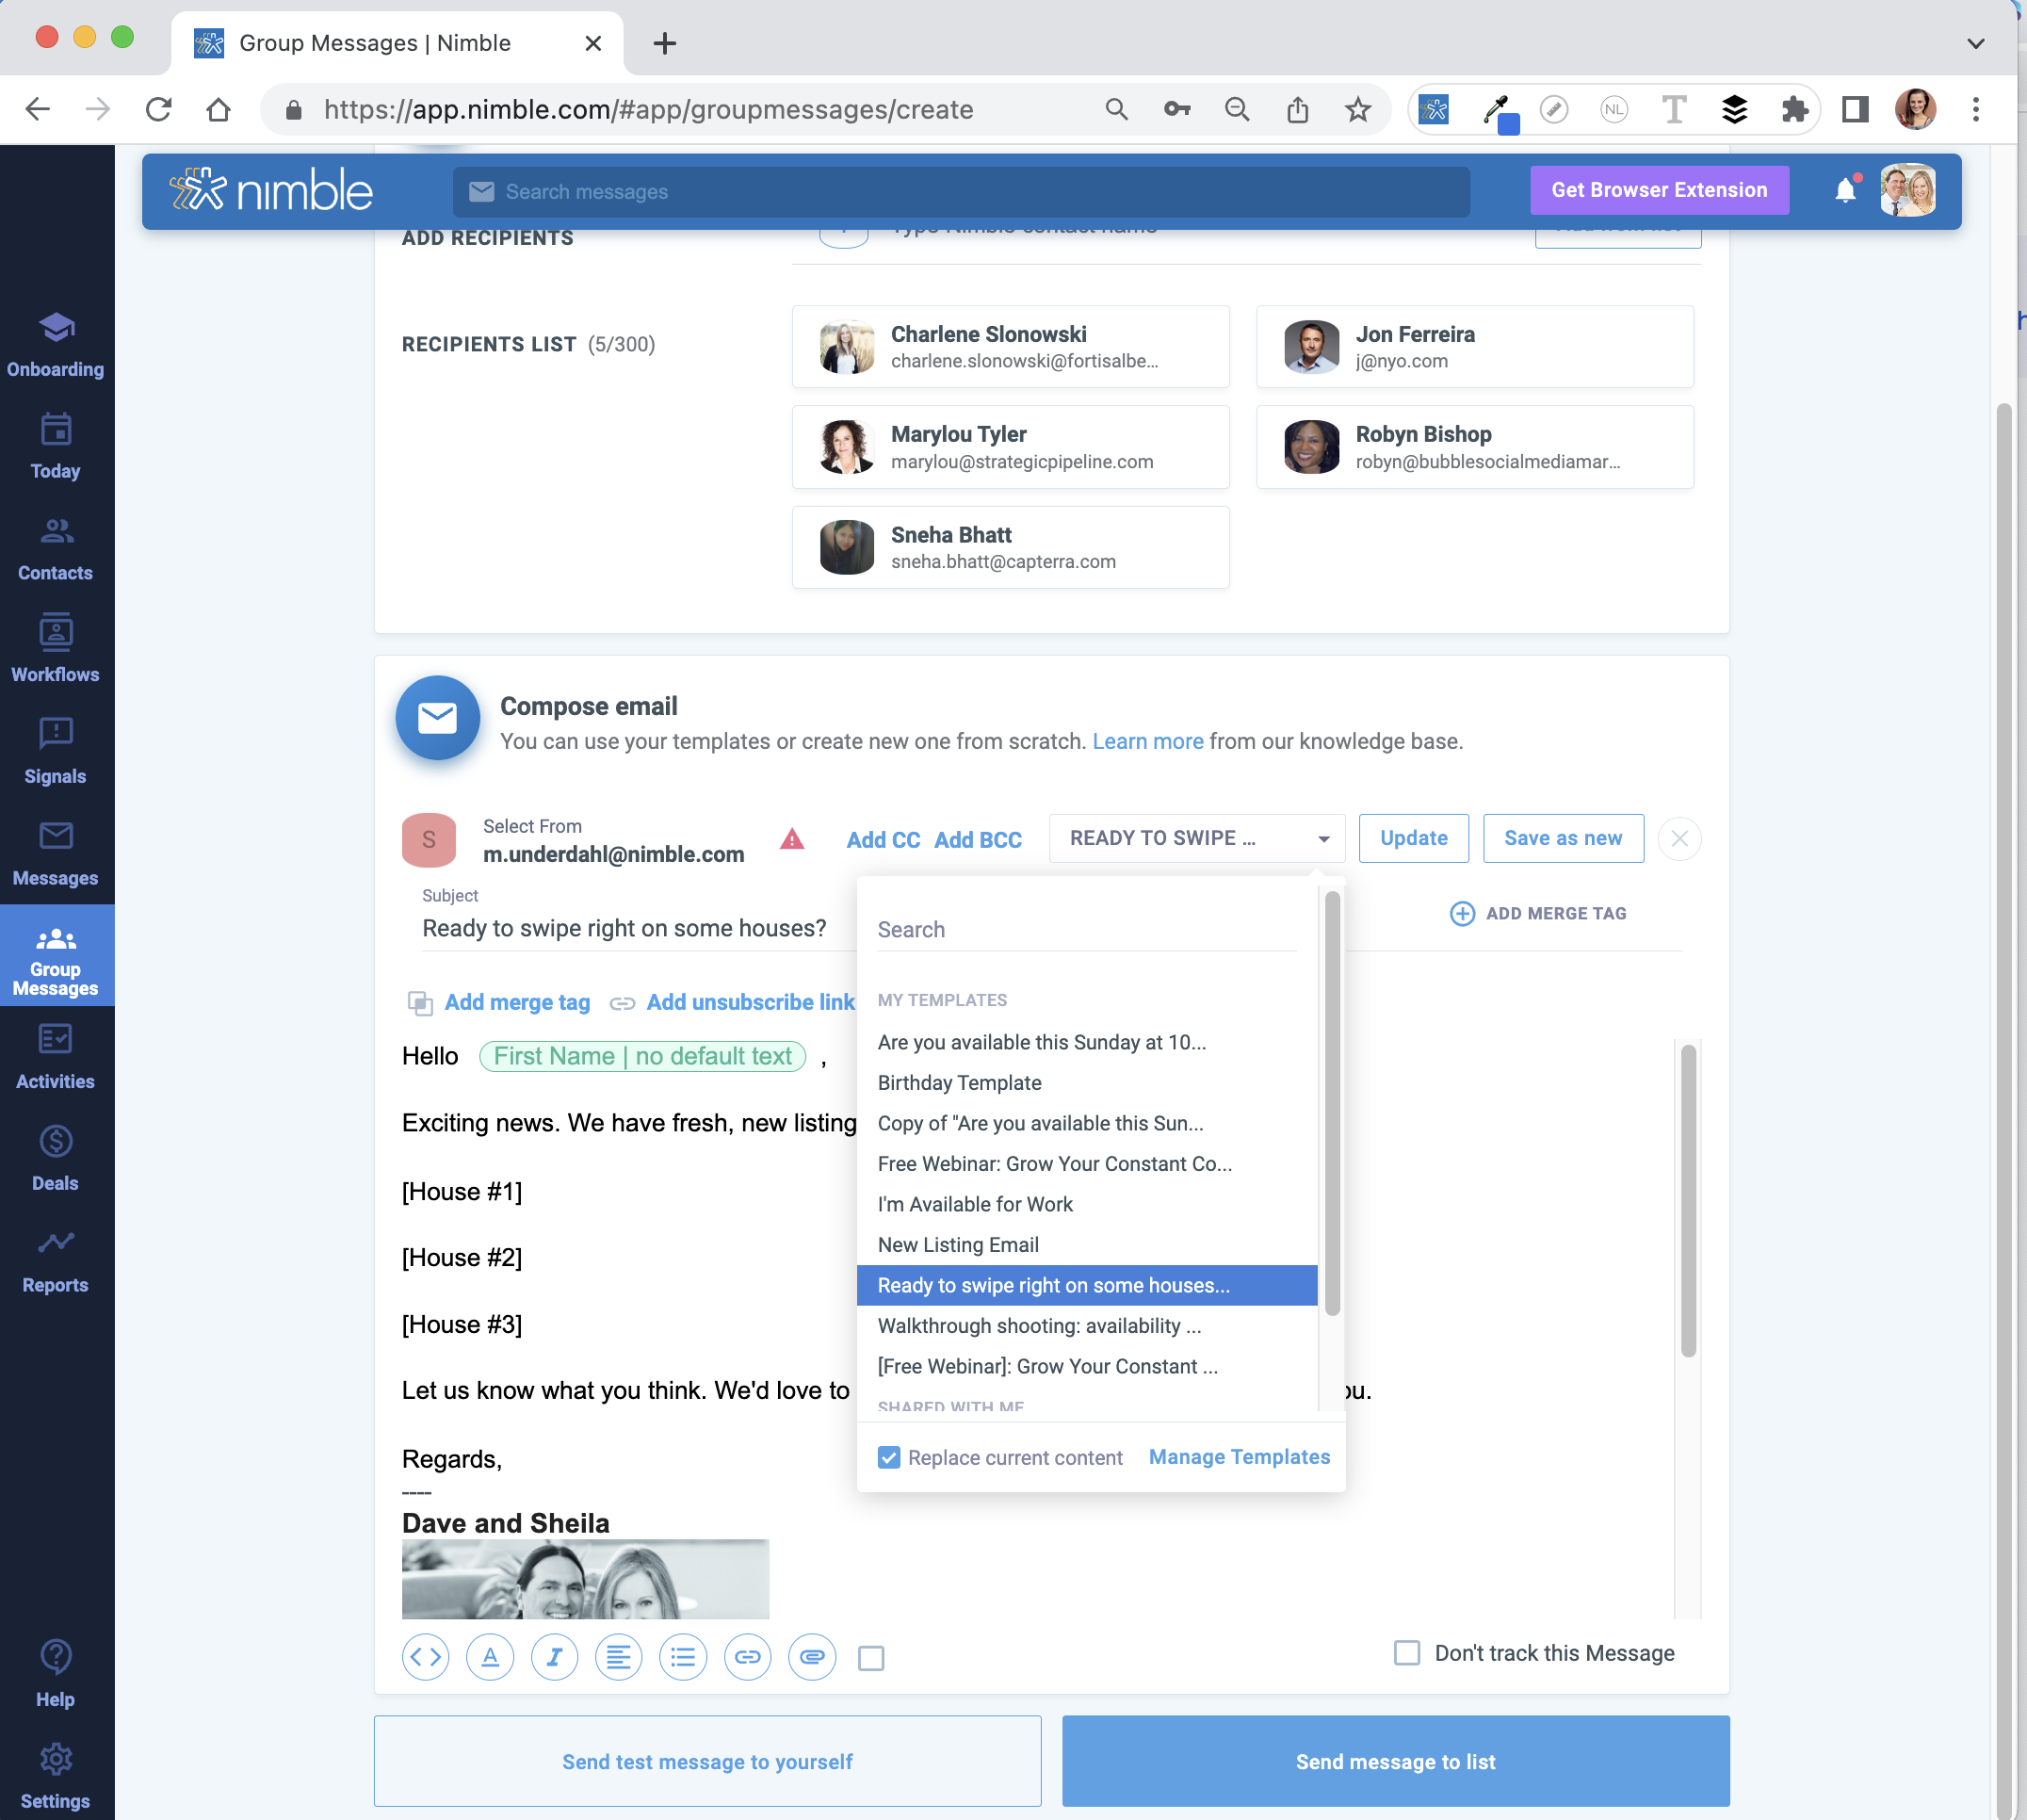
Tip #5: Create Templates to easily select when following up
To efficiently follow up with these recipients, create and save templates that can be used for future campaigns. Your templates can even reflect different follow-up situations.
Conclusion
By utilizing these Nimble group messaging strategies, you will see improved results through your network-building efforts. If you have any questions, our dedicated Customer Success team is always happy to help.

