Ever wondered what the best practices are for keeping your contacts organized in Nimble?
In my previous blog post, I shared some tips and tricks for keeping your contacts organized from the get go. This included “Tags,” “Marked Important” and the “Stay In Touch” feature. If you have not read this blog, please take some time to do so now. Don’t worry, I’ll wait. 🙂

Welcome back! Now that you’re all caught up, I’d like to share just 3 more features that work hand in hand to whip your contacts into tip top shape. Let’s jump into it!
Lead Details
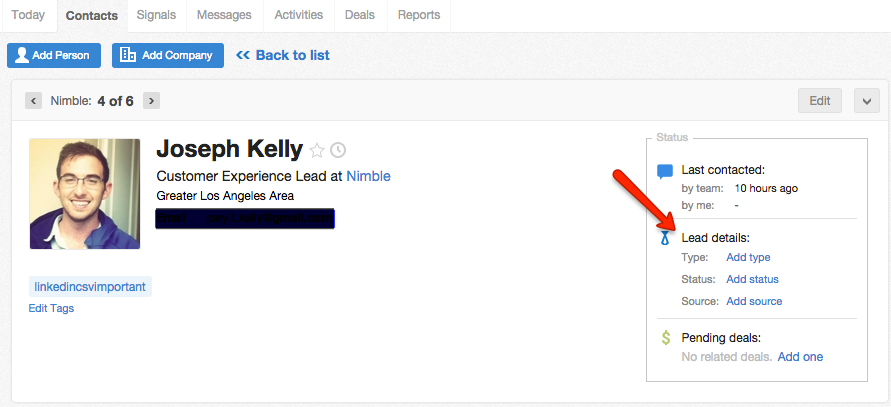
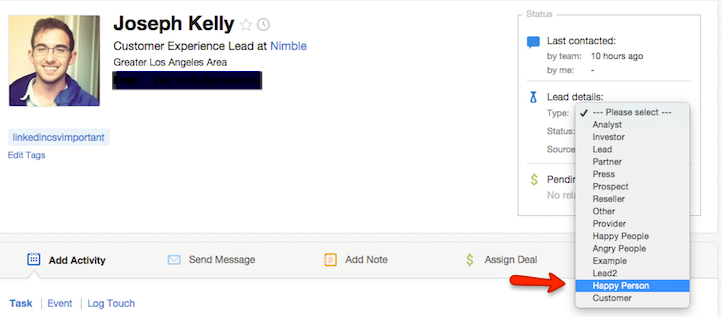
Lead Type, Status and Source are at the top of every contact record and they enable you to mark your contacts as leads, resellers, referrals and so on.
Nimble comes with it’s own set of lead details; however, they can be easily customized to you and your team’s liking.
Once created and applied to your contacts, you can then locate contacts with the same lead details by using the “Advanced Search” feature. An advanced search can then be turned into a “Saved Search” for easy access in the future.
In Nimble, there are two types of custom fields: “Lead Details” and “Data Fields.” Today, we’ll go over lead details.
For more information on Custom Data Fields, check out this support article: “Custom Data Fields“.
Customize Lead Details
Custom fields allow you to label your contacts and companies with unique fields that you and your team have created. This is different from the standard contact information in Nimble such as first name, last name, email address, etc.
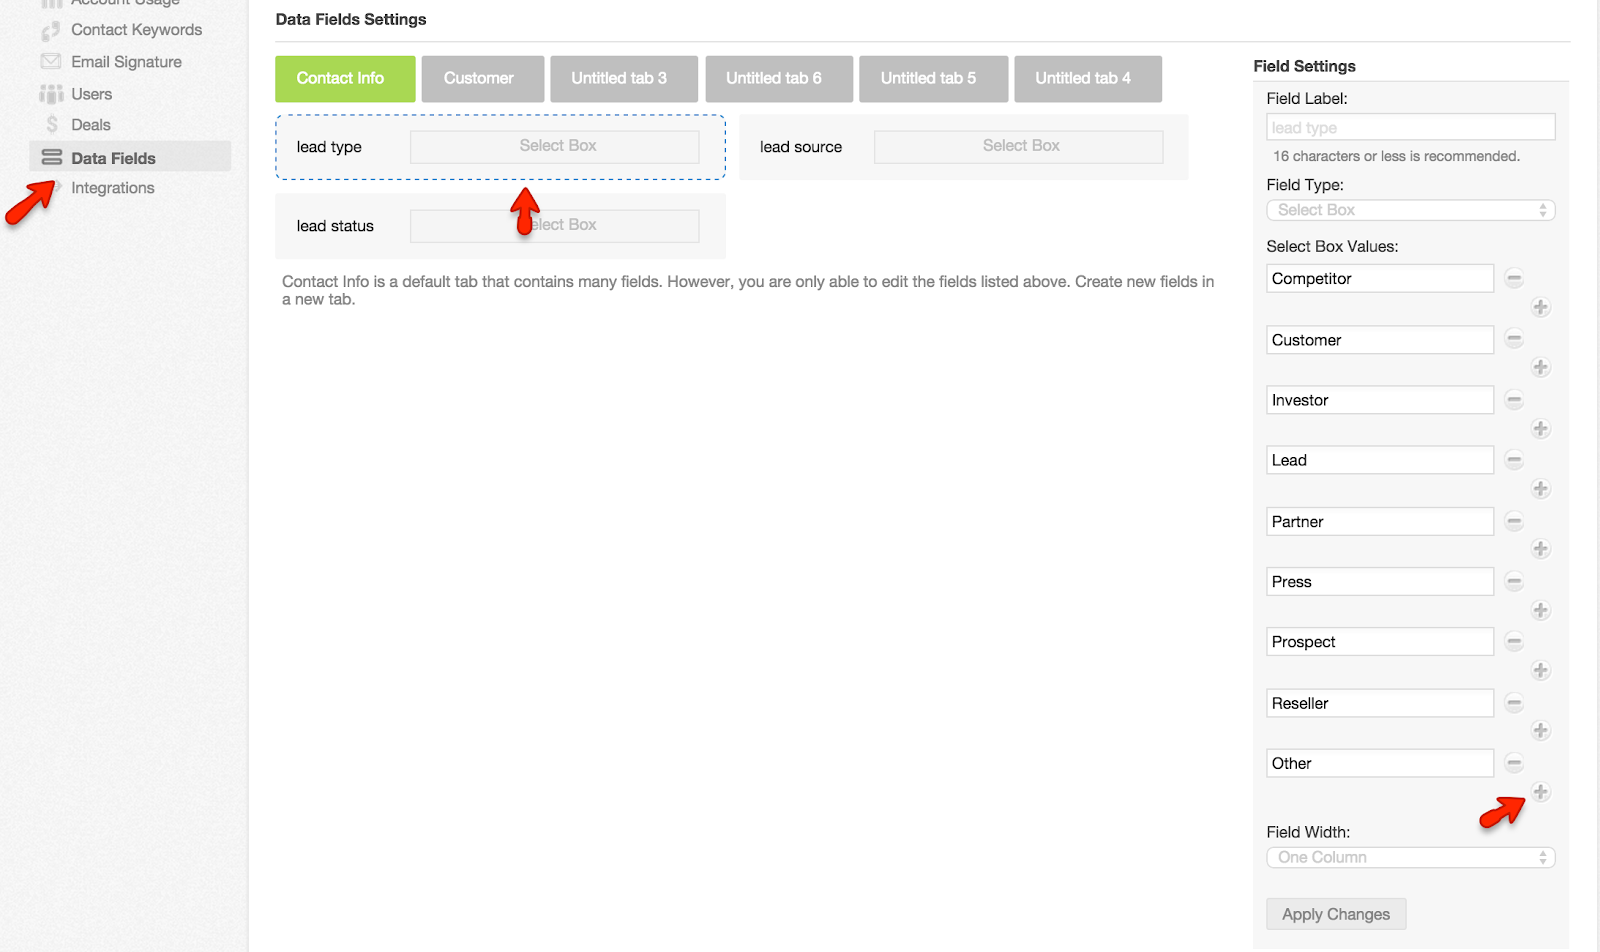
To customize your lead details, start by going to Settings >> Data Fields. You will then see three rectangular boxes labeled, “lead type”, “lead source” and “lead status.”
Click on one of the boxes (for example lead type) and “select box values” will appear to the right. You can add a value by clicking the plus symbol (+) and delete a value by clicking the minus symbol (-).
Now that you’ve added your customized lead details, they will be available to select at the top of your contact record, in the “Lead details” section.
Adding Lead Details To Your CSV File
Lead details can be easily added to your CSV file and imported into Nimble. In the CSV file, they should appear as so:
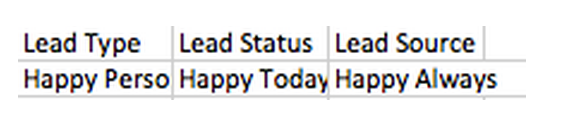
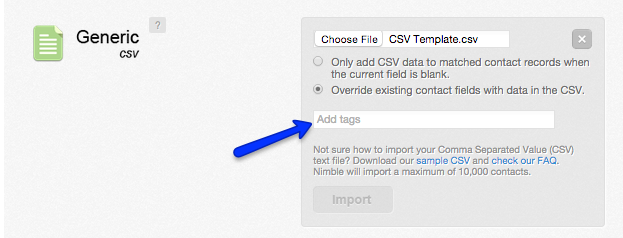
In your Settings >> Networks & Imports, use the Generic importer to add the file:
Advanced Search
Done. You’ve created your custom lead details and applied them to all your contacts! Now what?
Our “Advanced Search” feature is designed to help you locate contacts that match very specific criteria and you will now be able to use it to locate and group your contacts with the same custom lead details.
To start, go to your Contacts tab. In the search bar, click “Advanced.”
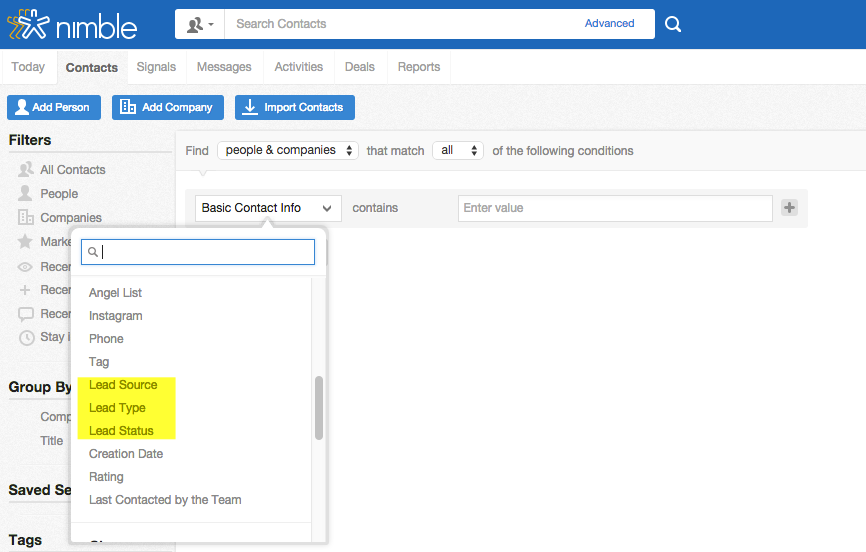
When you click on the arrow for the drop down menu, you are presented with a list of fields. Nimble has its own default fields which are listed at the top. Any custom fields you’ve created will appear below.
You will see searches for “lead source”, “lead type” and “lead status.” Click on one, then choose the value.
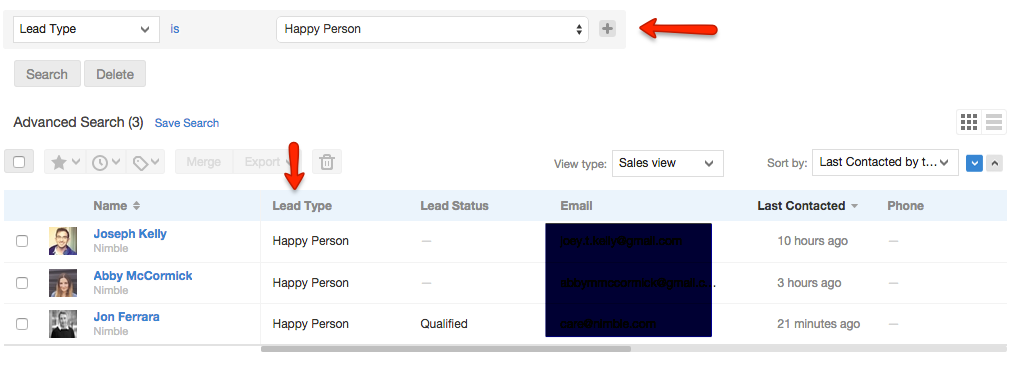
Nimble will populate all contacts with the same lead detail.
As you’ve probably guessed, advanced search is not only used for locating lead details. You can use this wonderful feature to locate contacts with the same city, job title, rating and so on.
This way, you can be sure to reach out to all your potential leads in Santa Monica and schedule a meet and greet before entering the golden state.
Saved Searches
Once you’ve finalized your search, you can then save it! To do this, simply click “Save Search” and name your search.
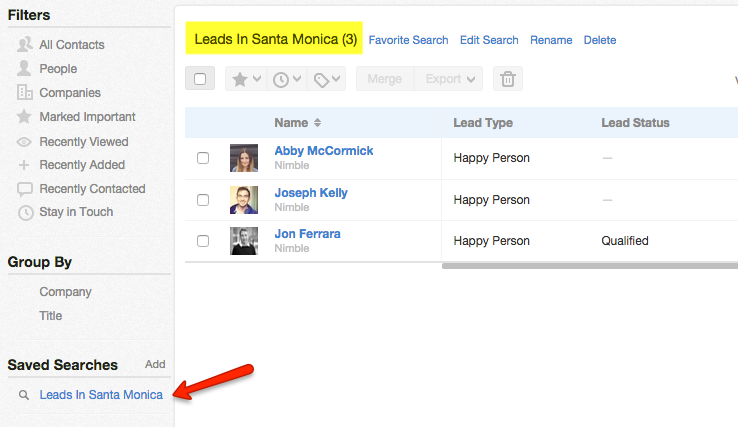
It will appear to the left under “Saved Searches.” This way it’s easily accessible to you.
Saved Searches are individual to each team member. This means, your list of saved searches will differ from your colleagues.
So there you have it, all the ways you and your team can keep contacts corralled in Nimble. Don’t wait to start the process. Be sure to apply tags upon import, mark them as important, add custom details, set time intervals to keep in touch and save any advanced searches. Do this right from the beginning and you’ll spend less time organizing and more time communicating with your leads.